Showing posts with label Army Painter. Show all posts

Sunday, July 19, 2020

Zenithal Highlight (part 2)

I've made some progress with the zenithal painting of my next three wee Scots.

I thought I'd start with the flesh. One of the videos I'd watched on painting over zenithal highlights (from Vince Venturelli's excellent "Hobby Cheating" video series) mentioned that it doesn't work well for skin, so you're better off putting down two light coats of flesh tone over the highlight:


I also worked up some of the "volumes" of the tunics with a white glaze over the zenithal highlight. This seems a bit fiddly to me (isn't this what the zenithal highlight should be accomplishing?), but the same YouTuber pointed out that all the time you put into "value sketching" at this stage will pay off at the end.

Getting the consistency of the glazes correct was a bit of a challenge and will take some practice. I'm sure it was only made worse by the fact that my paints have been sitting unused for years. So I followed the advice of another YouTuber and added a 5/16" ball bearing to each dropper bottle:


A messy proposition, but I feel like the paints are much easier to mix now.

After watching another one of the "Hobby Cheating" video series, I decided I might want to give dry brushing the hair a go. This means putting the flesh on hold for now (since dry brushing can be a bit of a messy proposition as well!). Here are the figs after an initial glaze or two of various Army Painter paints diluted with Vallejo Thinner Medium on their heads:


As usual - very slow progress as I muck about, but for me - that's mostly what this hobby is all about!

Tuesday, June 30, 2015

Finally at it again!

Well, it's been a long time.The family moved across country again and I started a new job. With all that going on I've only just now dug my hobby box out of the garage and gotten back to painting my poor neglected band of wee Scotsmen.

One of my motivations was that now that I'm back in Los Angeles, I've found some SAGA gamers much closer to me. The shop is only bout 15 minutes away - as opposed to the 2.5 hour drive I had back in Florida.

So I decided to take another crack at getting my 4 point Scot's warband completed. Since I'm still new to this hobby, I do fancy a bit of an experiment now and again. For my next batch of three figures, I decided to try the painting method described in Saxon Dog's Painting Guide (available as a .pdf if you ask him nicely).

I'll summarize the approach for those not curious enough to request the doc:

  1. Prime with white spray paint
  2. Wash the figure with black wash 
  3. Paint your base color
  4. Apply a highlight
  5. Wash with brown wash
  6. Re-highlight (with the same color as the first highlight)

I guess I'd consider this a Hybrid method. Not as point and shoot as the Army Painter dip method. Not quite as elaborate as the Three Colour method. Somewhere in between.

The idea is that you can get the "black line" look without it being as hard to see the details with a black-primed figure. But I found the black lining to be inconsistent. In some spots it wasn't very dark at all. In some spots the wash dried almost white.

Unlike Saxon Dog who used GW washes, I used the Army Painter inks. Lots of blogs have tested the various washes and inks. Like this one here.

The results:


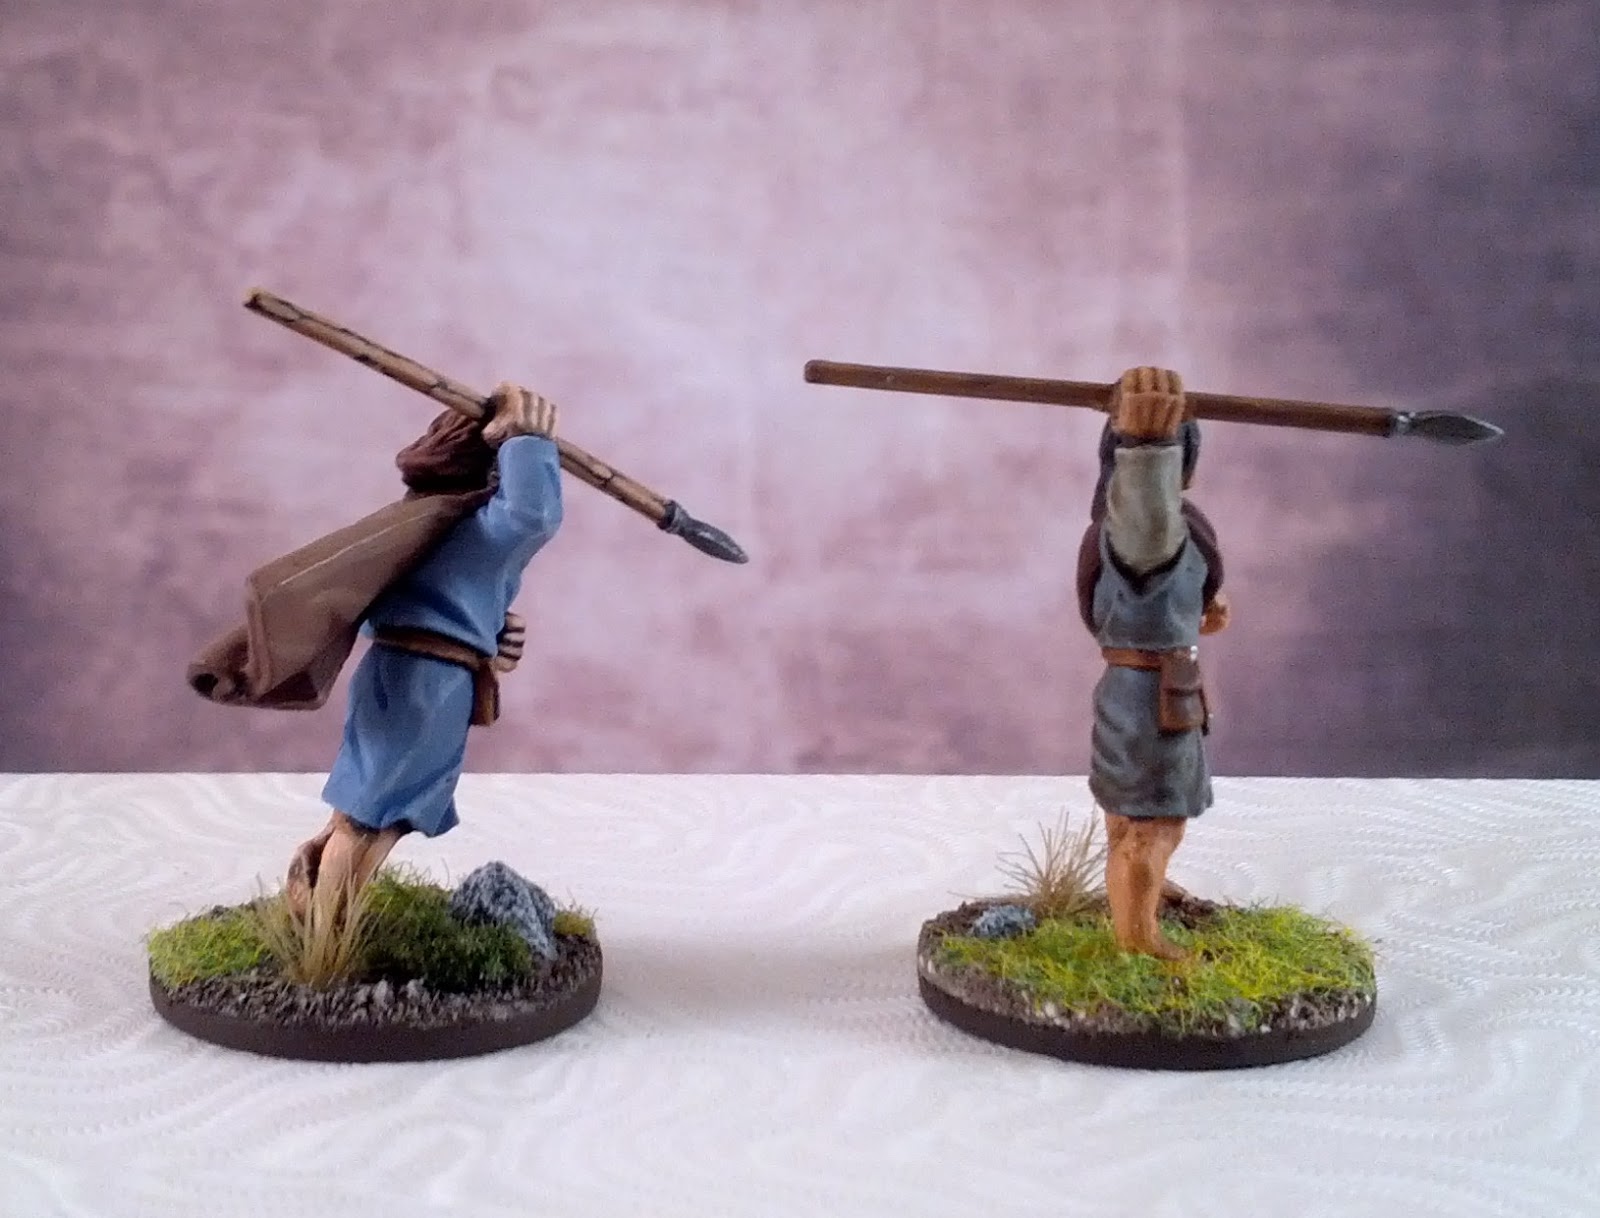
Yes, I still need to do the bases and the javelins.

What I learned:

I really don't like washes. They always makes things look to dirty or muddy for my taste. I think the washes were helpful on the hair though and might use them again for that.

Keep paint thin (but not too thin). Initially I was too lazy to clean and use my wet palette. I found my paints got goopy on me while I painted (slowly). The wet palette really is your friend.

I really like the da Vinci Restauro 3/0 brush I got. I may have to get more of them.

So, I guess it's back to the Three Colour Method for me. Unless I decide to dabble with VeronaKid’s Shaded Undercoats Tutorial.

Thursday, November 28, 2013

Marching Fort wall section (part 9)

Well, it's finally finished! Sorry for the lack of WIP shots, but I've been working in dribs and drabs and before I knew it it was done.


As I mentioned, I decided to make the ditch look wet. This is just some Humbrol enamel gloss varnish over a coat of acrylic matte varnish over the whole shooting match.


I flocked with some Army Painter field grass and then added some various tufts & flowers.


Some kitty litter rocks were added during one the previous painting sessions. These were dry-brushed with a couple different craft store acrylic grays. In hindsight I probably should have added them in more than just the ditch as the concentration of stones there looks a bit unnatural. Next time.


Here you can (barely) make out the work I did to mount the log stakes in the berm. As you recall they were separate for painting. I put some white glue down into the gap and them wiggled the fence in. Once dry, I added a bit of spackling on the sides to cover the gaps on the sides. After a day, I sanded and then painted over the spackling with more craft store acrylic burnt umber. 


 Not much to see on the backside. Just a few dry looking tufts. I debated adding some flocking here too, but decided that with all the marching going on the the marching fort, no grass would be able to take root!  =]

Now I have a decision to make. Carry on with more sections or noodle with trying a waddle fence. Stay tuned...


Thursday, October 24, 2013

Head-to-Head (rematch!)

When I finished the first three-color figure, some of you asked to see a comparison on the table. So I figured with a few more levy done I should have a rematch. This time the odds are even! Sorry the focus is a little soft on some of the photos:


Now that I have a whopping six (6) figures completed, I figured it's time to take a well deserved break and work on something different. Below is a hint. Any guesses?


Finally, I'd just like to point out that this is post number fifty! Thanks to all those along for the ride...

Monday, August 12, 2013

Head-to-Head

My three color method test levy is finally finished and based so I could take some head-to-head shots with my Army Painter dipped levy. I chose to use the two that had the same color tunic. Hard to believe they are the same color. That dip really muddies things up!


If you ask me there is no comparison. Well, perhaps the three color method spear looks too much like zebrawood. But other than that the difference is night and day. I guess the question now is, do I have the patience to paint the other forty guys this way...

Tuesday, June 18, 2013

New book!

Well, my Father's Day present finally arrived and I'm loving it:


I've already jumped in and started following his first tutorial with my new test levy. Here he is with just the flesh shade tone (AP Leather Brown) done:


I have to say even with those big ham fists of his, leaving black lines between the fingers was a challenge for me. I used my 3/0 Kolinski Spotter and had to go back in a touch up a bit with the black primer again. I suspect there will be a lot of that in my near future. After the enamel primer dries I'll go back in for the flesh mid tone (AP Barbarian Flesh). So far, so good!

Thursday, June 13, 2013

Paint it black!

OK, OK! I know I said I was all set to dive in and complete the rest of my Scots army. But then I saw this amazing image of some expertly painted Vikings on another blog and I began to wonder if the Army Painter dip method was ever going to be good enough for me.


The gentlemen that painted them was kind enough to answer my questions via email and although the technique he used is very involved and most certainly beyond my skill, I have decided that some more experimentation is necessary.

I'm going to try my hand at the three tone technique. I've asked for the figure painting bible for Father's Day. I realize this will take some practice and to that end I've primed up another levy that I'm prepared to strip ad infinitum. I didn't have any black spray primer so I've brushed him up with some Humbrol Matt Black enamel that I'd bought for base-coating the chainmail of my white-primered armored blokes.


Hubris? Perhaps. Will he ever get his army painted? Well, I guess we'll just have to wait and see...

Saturday, June 8, 2013

Finished! Sorta...

I believe I've finally finished the three test levy!!!


It's amazing what something as simple as painting the edges of the base does to make the whole figure feel finished.


 I'm not too fussed about the AP Battlefield Rocks. They make better sticks than rocks. I'll stick to the Woodland Scenics talus from now on. The one broken-off piece of talus I used on the levy in the green tunic's base (above) just painted up so much better. I may also try play sand instead of the AP flock too.


I went a little too sparse with the watered down PVA while applying my AP Battleground ash grey flock and kitty litter mix. It seems my old eyes were having trouble distinguishing the glue from the semi-transparent Lumina clay. This left some shiny, bald spots. Which wasn't too big of a deal as that just helped determine where to glue down the AP static Field Grass. A few of their Winter Tufts finished things off nicely. I still need to play around with how much of the base gets grass and how to make the shape of it look more natural.


Overall, I'm very please with the way everything came out. I'm still not entirely happy with the highlighting. Probably because I did next to none! I'll play around with that more with next batch of levy. Feels great to have these three in the can though!  =]

Now on to the other thirty-four little men...

Thursday, June 6, 2013

First Base

No, I'm not holding hands with Christine Anderson during recess. I've gooped, sandified, and painted my first bases.


Even thought I bought some Vallejo White Pumice, it seemed so messy that I decided to use Gareson's method which he kindly demonstrates on his blog. This calls for using Lumina Air Dry Polymer Clay which is much tidier than the pumice. I'll use the pumice for some wattle buildings or something.


He also suggests using sand and kitty litter as basing materials. I had already purchased (a recurring theme!) some Army Painter basing stuffs (battleground basing and battefield rocks) so I figured I should try to use those. I ended up mixing some clumping cat litter I had hanging around in with the battleground basing. I considering using play sand, but mine seemed too fine (and also too moist).  I ended up cutting the battlefield 'rocks' up a bit. They look a bit big and too wood-like for my taste. I also experimented using for Woodland Scenics talus to make a larger rock.


After gluing on the basing, cat litter, and 'rock' mixture, I applied a mixture of equal parts water, PVA, and cheap craft store burnt umber paint. Then I dry brushed with a tan and beige that I mixed up from burnt umber and some light ivory craft acrylics. I'm pretty happy with the way it came out. It was a bit laborious, so I may try to find ways to optimize (mix burnt umber paint into the Lumina clay?).

Next stop, static grass and tufts...

Spears!

Finally got the weapons added to my test levy:


I painted the spears and then used the Army Painter Dark Tone Ink Wash to shade them. I could have brushed on the Quickshade varnish, but I only have the Testor's Dullcote spray and didn't want to have to spray down the whole miniature again just for the spears. I guess I should get some brush-on matte finish, but this seemed to work fine.

Since I had already painted the hands I used an X-acto to scrape off the paint inside the hand and a bit of the spear to get a good metal-to-metal bond. I followed advice I'd read somewhere that suggested a drop of green stuff (I used the GW liquid greenstuff) along with a drop of super glue to set the spears. Seems to have worked a charm. I haven't really man-handled them yet, but they seem plenty sturdy.


As I had to go back and touch up the hands with my trusty Barbarian Flesh, I figured why not try a little dry brush highlight on the faces? So I did a bit very gingerly on the face of one of the levy. It looks pretty good. I have to say, it really livens the little guy up after that bath in grey grunge. I'm still not entirely confident in my ability not to screw the figures up at this stage so I don't want to go too crazy with highlights, but I can certainly see the benefits of it.

Monday, May 27, 2013

The Dirty Quarter Dozen

I think the first three levy are done! Well, except for the spears and shields. And bases. Well, OK they're not done, but the painting is.


I think I went a bit heavy on the wash. I'll try going lighter with the next bunch. I realized after I'd stained and matte coated them that I forgot to paint the metallic bits on their belts. So I hit them with some AP Plate Mail and then some diluted AP Dark Tone ink.

I told myself I wasn't going to mess with the eyes this time around as it seemed to fiddly for my first attempt. But when I showed them to my wife she said they looked like zombies, so I gave them a prick with a Staedtler pigment liner (0.1mm). They look better, but still a little off. I may try to put some white paint down first next time. Or heck, even leave the eyeballs with just the white primer.

Next stop weapons, shields, and bases. I may prime up the rest of the levy while those experiments go on. I've also got a powerful hankering to mess around with some foam core buildings. Must... Stay... Focused...

Sunday, May 26, 2013

Shading: A Second Go

I decided to brush on the Army Painter Strong Tone Quickshade this time around. I'm much happier with the results. I used the wrong brush but it was still much easier to control than the dip method. Below is a pic of the beloved test levy in each state: color blocked, brush-on shaded, and dullcoted:


Its going to take some trial and error to figure out what's the right amount of stain and where it should be. For example, I've definitely got too much on the legs of these guys. I used another brush to soak up some of the excess stain. I learned you need to check back on the mini after a couple of minutes as the stain tends to move and pool-up over time. You've got to remain vigilant as an area that looked good at first might start looking over-shaded.

I'm still debating high-lighting these guys. Part of me wants to kick them up a notch visually. Part of me wants to not bollocks them up and have to strip them again! I did paint on some highlights on the black haired gent before shading him (as the stain wasn't going to draw out much detail from the black). I also made an attempt to highlight via the method Dr. Phil Hendry suggested on a forum post:
"Once it's dry, everything gets a painted-on coat of Army Painter Strong Tone (sometimes I 'dry-brush' the 'dip' off the highlights on the tunics with a brush dampened with white spirit, just as the 'dip' is going tacky), followed (once that's dry) by a light squirt of Testors' Dull Cote."
I don't think I had much luck though. Perhaps I waited too long to 'damp brush' on the thinner, or perhaps my natural turpenoid isn't as strong as the white spirits he uses. I am going to give it another go though. I like the idea of being able to draw out some highlights easily (as opposed to mixing up lighter versions of the paints).

This was my first time using Testor's Dullcote. I'd heard mixed reviews of the Army Painter matte spray, so I went with what seems to be 'the old standby.'  I was a bit nervous as I am spraying outdoors in Florida, but the temperature and humidity were pretty much spot on (for once!). It took two light coats but the results were outstanding. The finish is very matte. Interestingly the only problem area was where I had used the most turpenoid while attempting to highlight. I'm guessing that area was no longer glossy enough to really take up the matte spray?

All told, I'm very happy with my progress and feel like I'm finally starting to make it out of experimentation phase and into the production phase. Which is good, because I believe my other thirty-four miniatures are starting to get a bit jealous!

Friday, May 24, 2013

Step-by-Step

This time around, I thought it would be cool to take picks of the minis at each step of the color blocking:


For those keeping count, this was round two of painting these gents. After the first shading dip fail, I stripped and attempted to re-prime them. That didn't go so well (high humidity?) so I tried a different primer (white auto-primer).

I like the look and feel of the auto primer. A couple of caveats though. It seems to be more fragile than the Army Painter primers. That seems counter-intuitive as, at least in theory, it should bond better to the metal since that's what it's made for. Maybe it goes on thinner or I've just been clumsier with the minis this week. Also, I need to be more liberal with the base colors when using the white primer. This time they've got a lot of little white specks peeking through. Hopefully the Quickshade will take care of that. We'll find out soon enough!

As to the painting, I've gone and forth on the wet palette. At first I liked how it kept the paints from glopping up on me during the painting session. But then it felt like I couldn't control how wet the paints were getting. Since I'm only painting these three stupid levy over and over again, I don't feel like I'm getting the benefit of the wet palette - helping you save paint when you paint day-in and day-out. My painting has been sporadic at best. I might try it out again but keep the sponge in the wet palette less water logged.

I had another brush fail. This time it's my own damn fault. All the advice was: buy some nice Kolinsky sable brushes. I am pretty cheap however and I was wooed by these awesome red handles. Talk about getting the cart before the ox! The handles are brilliant. The brushes are crap. They were marginally better than the Army Painter brushes, but still had some crazy wild hairs poking out at random. Painting miniatures well can be taxing on its own. Let alone with itinerant brushes. I finally broke down and bought some real brushes. They made it from England in two days! Have not yet tried them, but I'm optimistic...


Sunday, May 5, 2013

A Beer for SAGA?

Haven't made much forward progress with the minis over the past week. Its been raining cats and dogs here in central Florida so I haven't wanted to spray paint or varnish due to the humidity.

I did strip my minis by soaking them in a mild degreaser. It was pretty wild how they shed their skin afterwards under hot, hot running water! I made another pass at primering them with the AP Barbarian Flesh, but I think I must have held the can too far away. The minis were all dusty looking. Almost like they were flocked. Back into the degreaser. At this rate I should buy the stuff by the drum!

I also had issues with the spray nozzle. It sometimes wouldn't spray. It sometimes wouldn't STOP spraying. It sometimes spat out big droplets of paint. I think it must have been the humidity. Even though the rains had stopped it was still about 86 percent. I've broken down and ordered some white auto primer from the Amazon. I haven't given up on the AP primer yet, but I'm close!

While I wait for the auto primer, I'm enjoying a few of these:

"The goddess Sága and the god Odin merrily drink as the cool water flows."

Cheers!

Friday, April 26, 2013

Dip Dip Brush

As mentioned previously, I am experimenting with different shading techniques for my minis. I would love to go all Kevin Dallimore on them, but alas, my painting skills aren't there. Or at least, I am not ready to test them yet.

So I've opted for the Army Painter method. I've tried a different technique for each of my three sample Scots levy. I've dipped one figure in the Army Painter 'Strong Tone' QuickShade. While I like the idea of the QuickShade, I'd love to find a less toxic option. To that end I've also dipped a figure in an IKEA water-based wood stain. For the third figure I brushed on some Army Painter Dark Tone ink that came bundled with my starter Warpaints set. I felt like brushing gave me more control, but the dipping and flinging was strangely satisfying. Let's see how they came out.

Here are group shots of before and after (sorry the camera on my phone isn't more consistent):


The differences vary dramatically by technique. Let's start on the left side and work our way right.


This gent was done with just the ink wash. He's still flat (which is nice) but he isn't protected by a coat of varnish either. Kind of a mixed bag. The fingers came out nicely. Not much detail on the face though. The tunic looks pretty good although there seem to be some "tide marks" along the bottom. All-in-all a pretty subtle shading effect. 


This fella was done with the water-based IKEA varnish. He's glossy (but protected!) and the shading effects are very pronounced. Maybe too shaded. I feel like the brownish varnish stuck over all the surfaces, not just the folds and crevices. Perhaps that means the varnish needs diluting? It's inconsistent as well. There are big areas on his legs and tunic that seem untouched. Not too fussed about this one.


This last guy was done with the Army Painter dip. I'm pretty happy with this one. He's the glossiest of the bunch. A little too much varnish in most places. That part is pretty hard to control with the dip method. I think for my next test I'll try brushing on the Army Painter Strong Tone. Many sources suggested this, but I wanted to try the dip method for several reasons. One, it looked kind of fun. Two, it seemed easy. Three, I didn't have to mess with turpentine to clean brushes.

Lots of learnings here. I think brushing is the way to go. I definitely need to use less stain. I also think my base colors could go lighter since they are going to be muddied up pretty well by the stain. I guess it's off to buy some turpentine (or some disposable brushes!). I think I'll toss these guys in some degreaser and start fresh.

Another bit of good news. I'm off to see my first SAGA game tomorrow. A local group of historical gamers are meeting to play at a hobby shop about an hour way. Hoping to find something closer, but it's a start!

Saturday, April 20, 2013

So Much for the Bristles

Well, I knew something was off. For some reason I preferred my synthetic bristle Army Painter "Hobby" brush (that came thrown in with the starter paint set) over the fancy sable hair "Wargamer" brushes. I just couldn't seem to get the paint where I wanted to with the Wargamer brushes.

After a quick inspection and some googling, I found out why that is the case. I had washed all the brushes in hot water. Evidently that's not good for sable. I guess the little critters don't encounter too much hot water out in the wild. Here's what my "points" look like:


I ordered some brush cleaner and conditioner. It's probably too late for these, but it will help my next batch of brushes. Luckily they didn't cost that much, so it won't sting too badly to replace them.

In the plus column, I did finish all of my color blocking tonight for my three test case Scots levy.


Not too shabby considering this was my first attempt and my brushes were fubar.

Friday, April 19, 2013

First Go at Painting

Well, I've had my first go at painting. Overall it was a very enjoyable experience. I feel like there is something meditative about it. I can't wait to get back at it. So far it's just the tunics on three of the Scots levy for a test.


I experimented with diluting the paints this go. I think I might have overdid it. I used a drop of Vallejo Thinner Medium to a drop of the Army Painter Warpaint. I felt like it was a battle to get the color on. For the second coat I opted not to dilute and thought it went on much better. This gave me an idea for highlighting: apply the first coat undiluted and the second coat diluted. The color of the second coat will pool in the deeper areas and darken the color tone there. Maybe.


Obviously I've got more work to do on my flash finding and removal skills. Witness his left shoulder. Sigh. I guess I can always pretend its a fold line in the linen...

One thing I noticed my self doing while painting was holding my breath. I think it was because I was trying so hard to be precise with the brush. My shoulders keep coming up to my ears too. I had to consciously remind myself to relax and enjoy. This is a hobby after all!

I've got mixed feelings about the flesh tone primer. I can definitely see that I've got to be super careful about paint coverage afterwards. But I do like the fact that I'm "saving a step." I guess I'll reserve judgement until things progress a little more.

Next up some more color blocking and then experimenting with different wash/shading techniques.